Create EDI invoices
Using the create EDI invoices operation
This operation only reads your Sage 50 Accounts data, so there is no need to log out of Sage when running it.
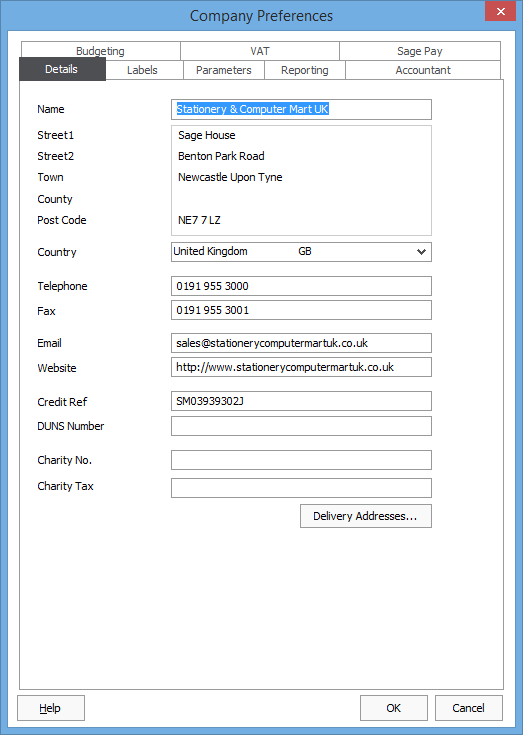 Enter your company name and address on the Settings > Company preferences > Details screen:
Note that the "County" is ignored, but it's important to have the correct country selected.
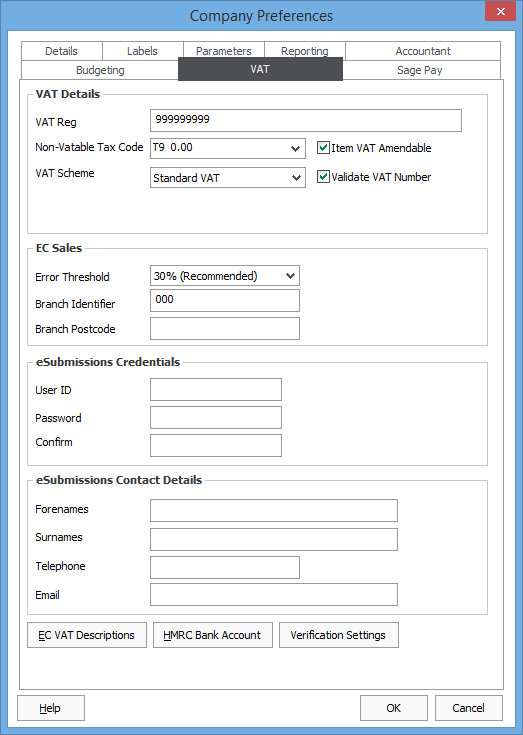 Next, go to the VAT tab on that settings screen, and make sure your VAT registration number is entered correctly.
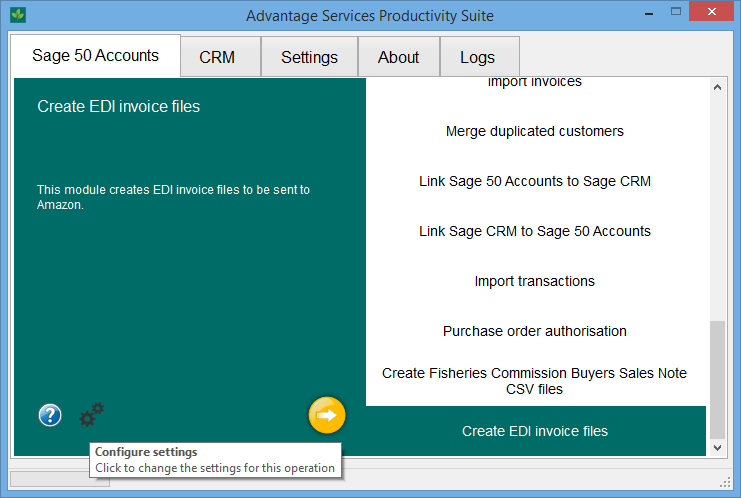 Next, back in Productivity Suite, click on the Settings button (the cogs near the bottom left) after selecting the Create EDI invoice operation, in order to edit just those settings specific to this operation:
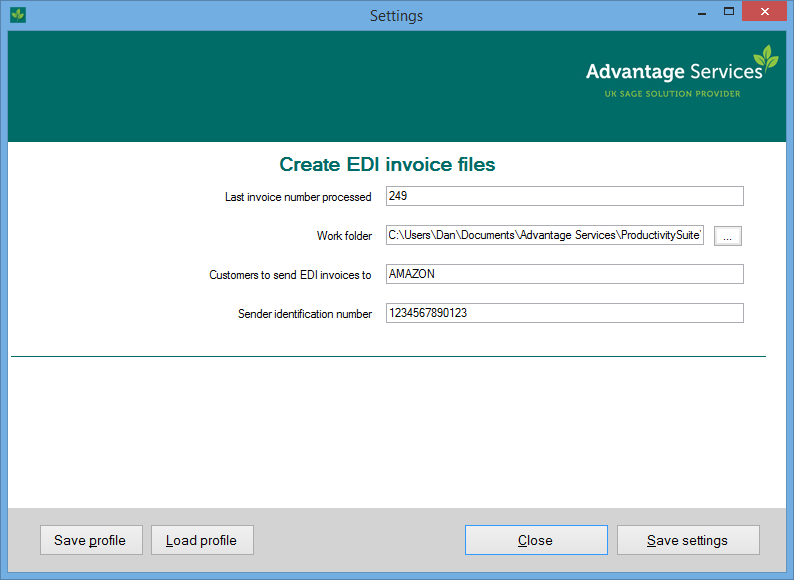 Enter your own company's GLN (which can be obtained from your EDI configuration information, such as on Amazon's merchant centre).
Also list all customers (giving the Sage eight-character account reference) for all customers to whom you wish you send EDI invoices. If you have several, then separate them with commas.
Customer setup within Sage Accounts
You need to complete these steps for every customer you want to send EDI invoice to
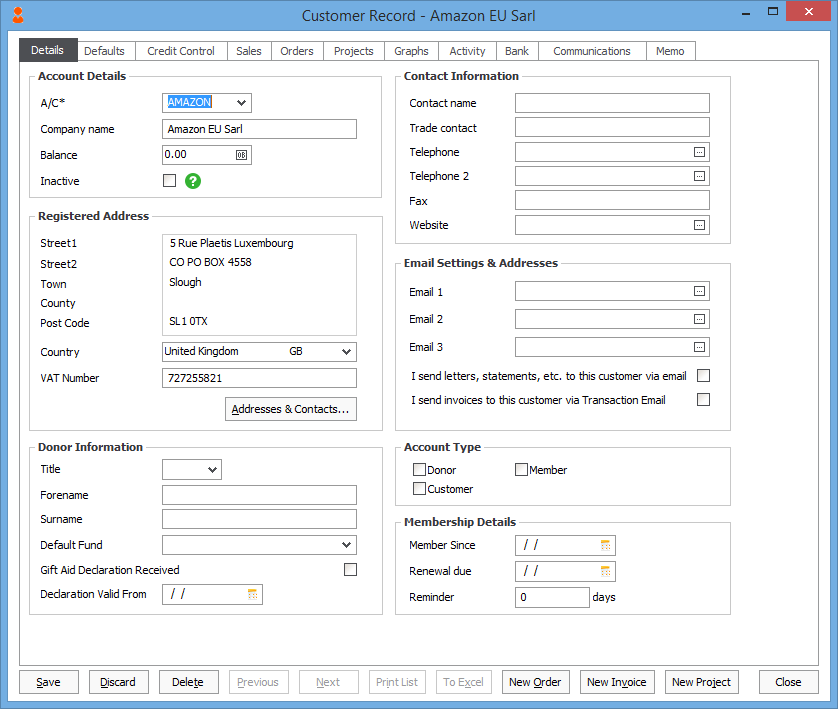 Enter the customer's name, address, country and VAT registration number on the customer record.
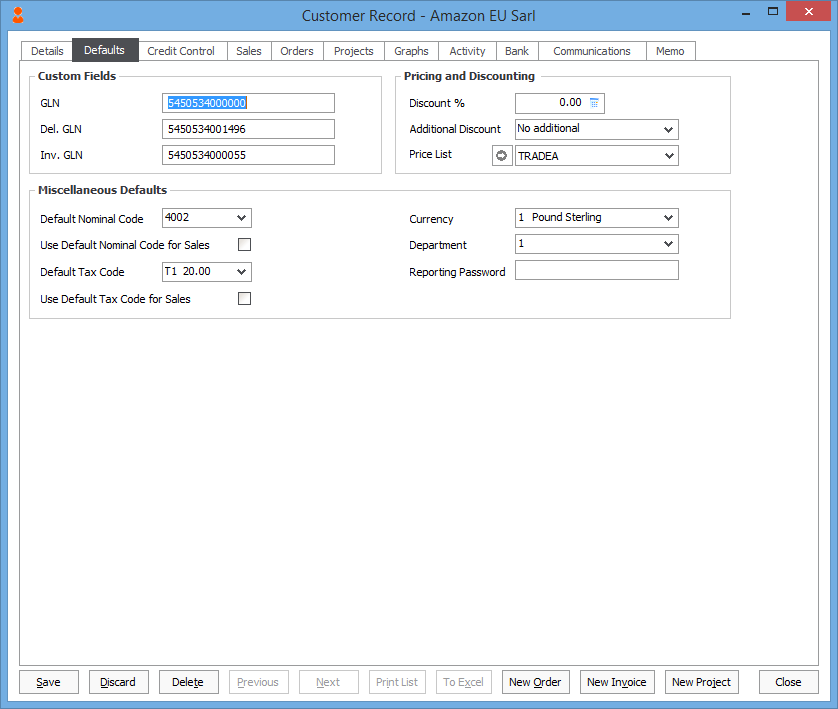 We use the custom fields to store:
- The customer's recipient identification number.
- The customer's delivery identification number.
- The customer's invoicee identification number.
When you've completed the setup
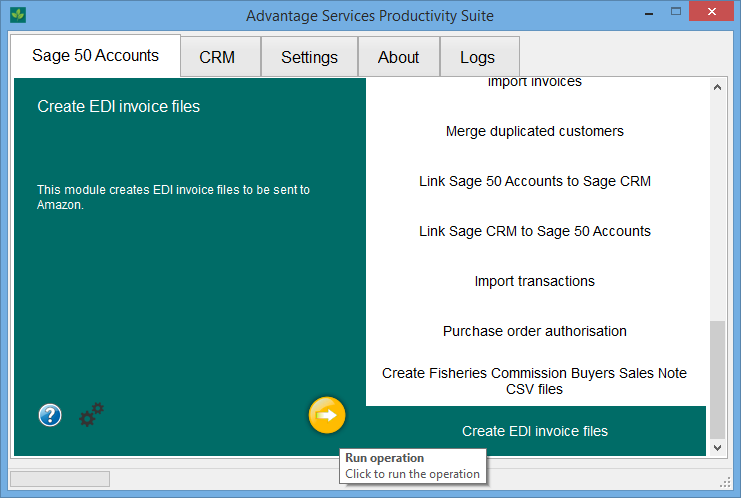 Once you are ready to run the operation, select the "Create EDI invoices" option from the list of operations on the Sage 50 Accounts tab, and click the "Go" button (the orange icon):